Oct 7, 2025
Fundamentals of Proper Insulation Installation
Proper installation of a home's insulation is critical to reaching its desired performance.
By: Pam Lewandowski and Clint Shireman
Making homes and buildings safe, durable, sustainable, and comfortable is more important today than ever. Insulation can contribute to a home’s overall comfort by delivering acoustic, energy, and indoor air benefits. Properly installing the insulation is critical to reach the desired performance. To learn why, let’s start with an overview of how insulation works.
The Basics of Heat Transfer
There are three modes of heat transfer:
- Conduction: Heat transfer via direct contact
- Convection: Heat transfer through fluid movement of molecules
- Radiation: Heat transfer through electromagnetic waves in a gas
The role that fibrous and open celled insulation has in mitigating these modes of heat transfer might surprise you.
How Does it Work?
Picture a wall without insulation (Illustration A below).
Inside of an uninsulated wall cavity, heat transfer occurs primarily through radiation and convection. Picture a wall with no insulation on a hot summer day: the sun heats the exterior siding (radiation), which then transfers heat to the exterior sheathing (conduction), and, in turn, radiates heat toward the cooler surface of the interior drywall. As the heat moves closer to the drywall, it starts to cool due to the air conditioning running inside the home, which aides in creating air currents in the wall (convection).
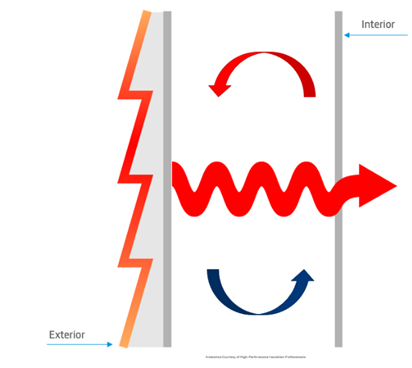
Now picture the same wall but insulated (Illustration B below).
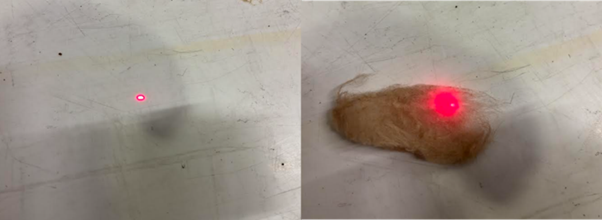
The heat transfer from the sun to the siding and then to the exterior sheathing will still occur. But then what happens? Since this illustration includes insulation in the wall cavity, the insulation is touching the exterior sheathing, which introduces conductive heat transfer through the cavity. However, most insulation isn’t solid, meaning the heat energy can only conduct where fibers or cells are touching. Radiation heat transfer will still occur despite not having a clear line of site from the exterior sheathing to the drywall.

As a fiber or cell absorbs heat energy through conduction, it will radiate the heat across tiny air pockets to another fiber, where it will transfer a lesser amount of heat energy as it dissipates across the network of fibers and cells. The more insulation we add, the more heat dissipation occurs. If the space is full of insulation, the heat transfer is lessened despite the increase in conduction, and there will be increased air resistance through all the insulation.
How Should Insulation be Installed?
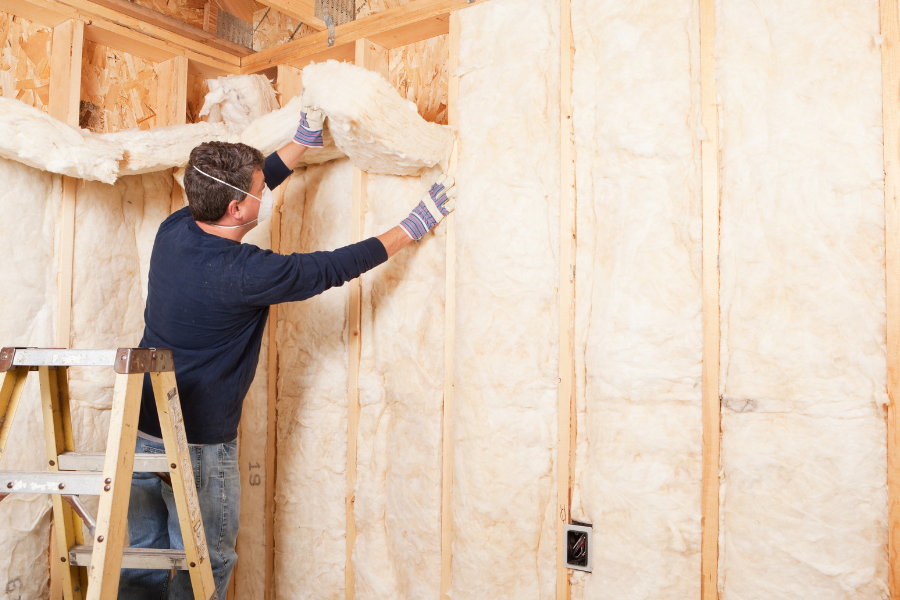
Knowing how insulation works is only half the battle. It is critical that the insulation is properly installed.
Since insulation works by dispersing heat through fibers, cells, and air pockets, to function effectively, the insulation must retain the properties intended by the manufacturer. Installing batts, dense pack, spray or loose fill insulation requires a variety of install methods. Using the correct method of installation for the type of insulation being installed is essential to allow the insulation to function properly.
For example, when installing batts, it is important to understand the R-value needed. The R-value refers to a product’s ability to resist heat energy—the higher the number R-value, the more heat resistance. Different applications and assemblies call for different R-values. For example, an R-30 fiberglass batt is typically installed in attics. Installing the same R-30 batt in a 2×4 or 2×6 wall will compress it beyond its manufactured thickness, resulting in a loss of labeled R-value.
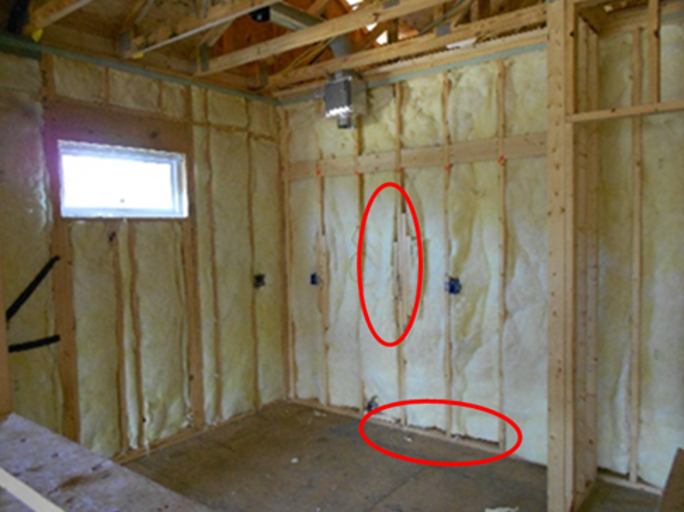
The insulation also needs to be installed properly to ensure it will perform at the desired R-value. For example, if insulation has been pushed too far into a framing cavity, has been accidentally stepped on in the attic, or cut too short creating a gap, the insulation may not perform at the rated R-value. This is because the fibers and air pockets have been compressed and compromised, reducing the thickness. To achieve the intended R-value, the insulation must have the correct density, thickness, and a uniform installation.
Dense pack insulation, on the other hand, must be installed to meet specific density requirements per cubic foot to provide the intended level of heat resistance. Improper installation can cause issues such as settling, gaps, or a lighter density, which can prevent the product from performing at its full potential.
What is Weighted U-Value and How Can It Be Calculated?
Determining weighted R-value of existing insulation requires more than finding a label or documentation from the initial install. We will need to calculate the U-values and convert them back to weighted R-value. While R-value refers to insulation’s ability to resist heat energy, U-value is a measure of how effectively a building material conducts heat, representing the rate of heat transfer through a structure. Lower U-values indicate better insulation performance. The weighted U-value or R-value can take into account the entire assembly and its real-world performance beyond what a product label might say.
Determining the weighted U-value (U=1/R) of a space (like an attic or a wall) requires a weighted calculation that takes into consideration the square footage, depths and materials used.
U-Value Calculation Example
Let’s look at a 1,000 square foot attic that has a 100 square foot section of flooring for storage. The insulation in the floored section is typically compressed to accommodate the decking. To calculate the weighted U-value of this space, measure the surface area of sections with compression or gaps, and the surface area of sections with full insulation. Next, measure the varying depths of the insulation in these sections. In this example, the attic has 900 sq. ft. with an insulation depth of 13 inches and no compression and 100 sq. ft. with 6 inches of compressed insulation. To find the R-value of the insulation in these sections, refer to the manufacturer’s rating for the most accurate numbers. For this example, we will assume an R-value of 3 per inch, resulting in an R-value of 39 for 900 sq. ft. and an R-value of 18 for 100 sq. ft. To get the weighted U-value, we need to start by dividing 1 by the R-values.
(1/R39 = U0.025) and (1/ R18 = U0.05)
Next, multiply the U-value of the sections by their respective areas and add the results.
(0.025 x 900ft2 = 22.5) + (0.05 x 100ft2 = 5)
The sum of these numbers (27.5) is then divided by the total attic area to get the weighted U-value. Then, transition it back to R-value by dividing 1 by the result.
27.5 / 1000ft2 = 0.028
1 / U0.028 = R-35
This small section of less insulation lowered the R-value of the entire attic because it interrupts the heat dispersion process of areas adjacent to it. In other words, areas with less insulation allow more heat energy to pass through compared to properly insulated areas, leading to a greater overall R-value loss than you might expect.

In new or existing construction, small areas of compression, incomplete fill, or incorrect densities can add up to a big loss in performance.
We owe it to our clients to deliver performance as promised. Installing insulation to the correct specifications can ensure that the R-value documented is the R-value provided to the client.

Pam Lewandowski is the Manager of Training at LaHouse Research and Education Center. LaHouse is a display of sustainable, resilient, and healthy home building practices for the gulf region. The research-based facility is located on LSU’s Baton Rouge campus and displays building techniques and solutions for Louisiana homes. Clint Shireman is the Manager of Training at Knauf Insulation. In this role, he trains builders and contractors on the best practices of insulation and air sealing for optimum building performance and indoor air quality.