Jul 14, 2022
Single-Family Home Retrofit Basics
The majority of single-family homes in the United States are older and they are often in need of a little help. There are many ways to make each of them more energy efficient and oftentimes more healthy.
By: Larry Harmon

The majority of single-family homes in the United States are older and they are often in need of a little help. There are many ways to make each of them more energy efficient and oftentimes more healthy. This article will discuss many of the options available for retrofitting homes. Not all of these will be viable for each home. Nor will they all be good options in every climate.
There are a couple of things we need to remember as we look at retrofitting single-family homes. Heat moves from hot to cold. Air moves from areas of greater pressure to areas of lower pressure. Moisture moves from areas of higher moisture to areas of lower moisture and from warmer areas to cooler areas. In general, stuff moves from more to less.
We need to think of a home’s shell or building envelope as having two components. The first is the thermal boundary. The thermal boundary is the insulation system whose purpose is to keep the heat inside and the cold out or vice versa. The air barrier is the second component of the building shell. The air barrier needs to be aligned with the thermal boundary for the building envelope to work right. Its purpose is to minimize infiltration of outside air into a home and to keep hot humid air out of insulation systems. This hot humid air can condense and cause mold, rot, and other nasty things to happen.
Think of the thermal boundary like a sweater and the air barrier as a wind breaker. If you’re standing outside on a windy day, in order for the sweater to work well and keep you warm, you need something to stop the wind from whistling through it.
As you contemplate retrofitting a single-family home, you also need to be aware of the concept of interactivity of measures. For example, on a given home you may be able to retrofit the heating-and-cooling equipment and come up with, say, a 25% savings estimate. Looking at the building shell, you may also identify an additional 35% savings available. Does this mean you are going to manage to get 60% savings? You probably will not, because of how measures can interact and change overall outcomes. Fortunately there are many good options to help you estimate what the savings may be (see “How to Calculate Savings”).
Let’s go ahead and take a look at the different opportunities we have when considering retrofitting a single-family home.
Air Sealing and Ventilating the Home
The purpose of air sealing a home is to keep the cold out and the hot in, or to keep the hot out and the cold in. Air sealing in cold climates is different from air sealing in hot climates. The idea is to keep hot, humid air out of and away from the insulation systems. In a hot-humid climate, the air barrier should be on the exterior of the building envelope. In a cold climate, you want the air barrier on the inside.
When dealing with homes, to seal or not to seal is sometimes the question. For example, let’s look at a house in a northern climate such as Maine’s. It is a tight house with a poor fiberglass insulation job in the attic. You can see a number of holes between the house and the attic. But a blower door test indicates that the house is tight. Further tightening would probably result in the need for a ventilation strategy for the home. If you want to fix the fiberglass and install additional insulation over top to improve the attic’s performance, do you need to air seal the attic, since the house is already tight?
The answer is real easy. It is yes. Here is why. Improving the insulation will result in a cooler attic in the winter. With a cooler attic, condensation is more likely as the holes between the house and attic continue to leak hot, humid air from the conditioned spaces up into the attic. Looking at a psychrometric chart, we see that 70ºF air at 50% relative humidity will reach saturation (condense) when the air is cooled to just 50ºF. So fixing the insulation and cooling off the attic could very easily create a moisture problem. Many houses experience failure when insulation is improved without air sealing.
Keeping with the theoretical house, the first thing to do before starting the attic work is to get the ventilation strategy inside the house sorted out. Exhaust-only using an energy-efficient fan and some type of controller is often the least expensive option. In homes that have duct systems, the Aircycler is a great solution. It will monitor flow, open and close fresh-air dampers, and allow you to program how much air you want to add to the home. For even more money you can install an energy- efficient ducted heat recovery ventilation system. A final airtightness test, following air sealing and insulation, will help you to determine how much ventilation you need.
Once the ventilation is set, the next step is to seal all cracks and holes into the attic. Typical holes include gaps around wiring and plumbing penetrations, soffits, top plates of walls, recessed lights, knee walls, and chimneys. They can be sealed with any suitable caulk/backer rod combination (slow) or spray foam (fast). Chimneys need a fire-rated caulk and a sheet-metal dam to seal the gap and prevent insulation from contacting the chimney.
Some homes have vented soffits in place. Often they will also have vent chutes secured between rafters or trusses to direct air up along the roof deck. If you are air sealing the exterior wall plates and plan on adding more insulation in the attic, this is a good time to form an air barrier around the vent chute so that the ventilation air will flow up along the roof deck as intended. Without an air barrier there is nothing directing the outside air to flow up the chute. Air sealing the chute will protect the insulation from windwashing via the vented soffits.
So far we have only talked about sealing the top. What else needs to be sealed? Generally you would target the top, bottom, and sides. What this means can vary, depending on the house. If the house sits on a slab, sealing the bottom may mean sealing any leakage coming under the plates of the exterior walls. In a basement or crawl, you have to decide whether to seal the perimeter or go after leakage in the floor between the crawlspace and the upstairs. The band joist is a common leakage site and can easily be sealed and insulated with foam products, if you decide to focus on the perimeter.
Doors and windows are other typical leakage sites. For these, there are very high-quality weatherstripping products available that will last for many years. When buying weatherstripping, buy the best you can find. The difference will mean many years of additional service from that product.
Upgrading Attic Insulation
In most climates, it is getting harder and harder to find uninsulated attics. This is due in large part to rising energy costs over the past 30 years or so. But it often makes sense to increase the existing attic insulation. Depending on the home and the climate, you may be looking to upgrade to R-50 or more.
A good baseline is to look at your local code to see what the minimum is and then exceed it by an amount you are comfortable with. As long as you are going to the trouble to get materials, equipment, and workers together to add insulation, it makes sense to exceed the minimum. This is because the costs of installing additional insulation at that point are incremental.
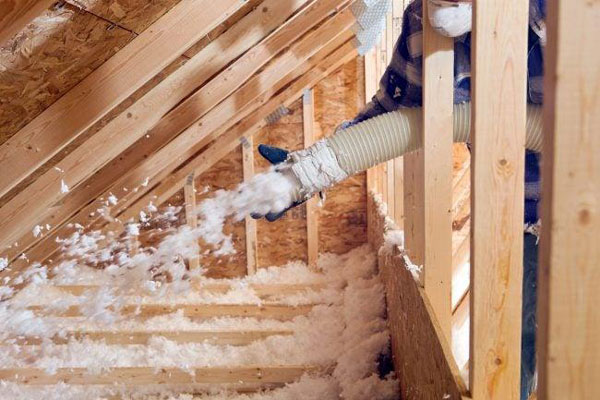
Options for adding insulation include foam-in-place, blown-in loose-fill, and batt-type products. Loose-fill products like cellulose, rock wool, and fiberglass can be easily blown in place once the attic is prepped. This is a fast, simple, and very effective solution once the attic has been air sealed. Do not add insulation to an attic without air sealing it first.
When increasing insulation, adding batts is not generally the best solution. This is due to the difficulty of placing batts properly in an attic environment and the performance loss caused by gaps between batts. A common batt retrofit approach is to run the second (and third) layers at a right angle to the original batts. This will prevent gaps from lining up vertically one on top of the other. In a trussed attic this is next to impossible, because the web members join the top and bottom chords together.
Foam is a neat, fast, and easy solution, but it is expensive, and it is most effective if it is the first layer against the Sheetrock. In a hot-humid climate, a spray-on, closed-cell foam might be a neat solution over the top of existing batts. In a trussed attic, truss uplift may begin to occur when you change the dynamics of how the attic works. This can happen if the original insulation fitted poorly and was ineffective, and the new insulation changes that dynamic. Uplift occurs when a bottom chord becomes warm and shrinks slightly while the top cord remains cold and expands due to moisture entering the wood. The best defense is to do a really good job of air sealing the attic before you install more insulation, and to eliminate other sources of moisture, such as exhaust fans dumping moist indoor air into the attic.
Upgrading Wall Insulation
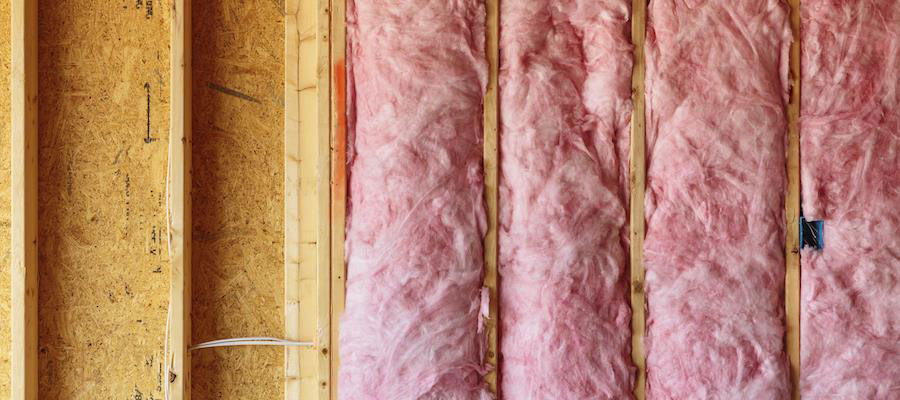
Many older homes lack wall insulation. For many of these homes, adding insulation using a blowing machine can be a very effective retrofit. The insulation can be injected from either inside or outside the home. Outside is often a lot cleaner for the occupants.
Any short-strand mineral fiber insulation will work. However, the most popular material for this application is cellulose. Cellulose is often considered a green solution, due to its recycled content.
Another benefit of using cellulose in this application is that when it is blown to a sufficient density (greater than 3.5 lb per cubic foot), the fibers restrict air flow and reduce infiltration as well. Cellulose blown at high density is generally injected via a fill tube that is inserted into the wall cavity and removed a little bit at a time as the cavity fills up.
There are several advantages to this method. First, by inserting the fill tube throughout the cavity, the installer can quickly tell if there are any obstructions in the cavity that might prevent a complete fill. Second, when the material is applied all the way up in the cavity and allowed to pack down, slumping material and voids become much less likely. Finally, tube fill application allows the installer to drill only one hole per stud bay unless blocking is present. Two or more holes are generally used in nozzle-only applications.
In homes with older substandard wiring, a qualified electrician should inspect the wiring before the wall insulation is installed. Homes that have knob-and-tube wiring should have the wiring replaced before you proceed with the wall insulation. Walls that have evidence of water leaks or other damage should have those problems corrected before insulating.
Some homes may have a small partial batt in the wall. Often these batts are papered on each side and are about 1 inch thick. It may be possible to retrofit these walls with the fill tube method, providing the tube can get through the partial batt and up to the top of the cavity. This is often accomplished by using the insulation blower with the material feed closed, using air to push the batt aside as the tube is snaked up through the cavity. This process is much slower than insulating empty walls, but I have had many happy clients who loved the work and didn’t mind the extra cost to get a more comfortable, efficient home.
One popular but ineffective idea is to add rigid foam board to the outside of a home when re-siding it. If the walls are not insulated, the foam will provide little insulation at best, because the thermal boundary and the air boundary will not be in alignment. Remember the sweater/windbreaker analogy? How well will the sweater keep you warm if it is 4 inches out from your skin?
Basement, Crawlspace, and Floor Insulation
Basements and crawlspaces can be upgraded from an insulation standpoint. The thing to decide (as when air sealing) is where you are going to define the thermal boundary. The insulation needs to align with the air barrier.
In basements or crawlspaces, you have two options when retrofitting a house. You can bring the basement or crawlspace inside the thermal envelope by insulating its walls. Or you can leave the basement or crawlspace outside the thermal envelope by insulating the floor between it and the house above. Many times this decision is made for you by the presence of mechanical equipment in the space, which makes bringing the space inside the thermal envelope the best option. This may be the best option for other reasons, too.
In hot-humid climates, insulating the floor and venting that nice cool crawlspace with hot, humid air may be a recipe for mold and rot. In very cold climates, having the entire space underneath the house outside the envelope may result in more heat loss than would be the case with an adequately insulated foundation wall. In the latter case, the below-grade portions of the basement are quickly tempered by the insulating properties of the ground.
How do you retrofit a basement or crawlspace wall? There are two basic approaches. The first would be to use rigid-foam sheet goods. These can sometimes be glued in place on a supersmooth foundation wall, but the best solution is to hold them in place using some sort of mechanically fastened strapping, such as 1 inch x 3 inch furring strips secured with TapCon screws. This may seem onerous, but if you are using full-size sheets, the work moves along quickly. If the space is occupied, depending on the local codes, you may be required to cover the foam with a noncombustible material.
The second approach to retrofitting these walls is to use batt insulation encased in a vinyl shell. This insulation is hung down from the band joist. It may need to be supported by a frame.
Sometimes foam insulation can even be applied to the outside of the foundation wall. However this approach quickly gets expensive, because soil must be removed from around the wall; because the bottom of the wall must be flashed; and because the foam board must be coated to protect it from pests.
The band joist area is discussed above, in the section on air sealing. Use of foam products in the band joist area not only seals the air leaks but provides much-needed insulation as well.
If you are going to insulate the floor instead of the walls of the space, your options are limited. Batt insulation is usually used in this application. When insulating the floor, the air barrier is defined as the basement ceiling. Therefore, this area (including the band joist) should be well sealed, before the insulation is installed.
The difficulty with using batts comes in fitting the insulation past wires and pipes. Many of the joist bays will not be of uniform width, making the fit more difficult. Finally, the batts must remain in contact with the subfloor in order to have the thermal boundary and the air boundary aligned. So use twice as many supports as you think you need.
Another less common approach is to install an insulation barrier and blow in a loose-fill product. This approach has the advantage of ensuring a complete fill with few or no gaps and voids. However, the time spent installing the barrier and blowing the insulation in will dramatically increase the labor costs. In addition, joist bays insulated in this manner are encased, making future repairs and modifications to plumbing or wiring difficult.
Whenever you are treating basements or crawlspaces, if there is exposed earth be sure to seal thoroughly with polyethylene to reduce the moisture load on the building. Leakage and other water intrusion must be corrected before you insulate and air seal these areas.
Mechanical Upgrades
Modern, high-efficiency, direct-vent combustion appliances can dramatically reduce a home’s energy use. They provide other benefits as well. Properly installed direct-vent appliances isolate the combustion process from the home’s air, making the home safer. When changing heating-and-cooling equipment, pay attention to proper sizing. ACCA Manual J, Manual S, and Manual D give the benchmarks for sizing units and ductwork. There are numerous computer programs that automate the process. Put very simply, not sizing is malpractice.
There are many different high-efficiency boiler packages. Most of these offer integrated domestic hot water. Some have variable firing rate burners, and others offer multistage firing. Most can vary the heating water temperature using outdoor sensors, a must-have feature. These boilers boast efficiencies in the mid-90% range.
New furnaces also offer significant improvements over older models. Many come with high-efficiency blower motors that save electricity as well. A lot of the better manufacturers offer improved filtration systems. Most of these furnaces will be multistage low/high fire models. But the thing to remember about furnaces is that they are only as good as the duct system.
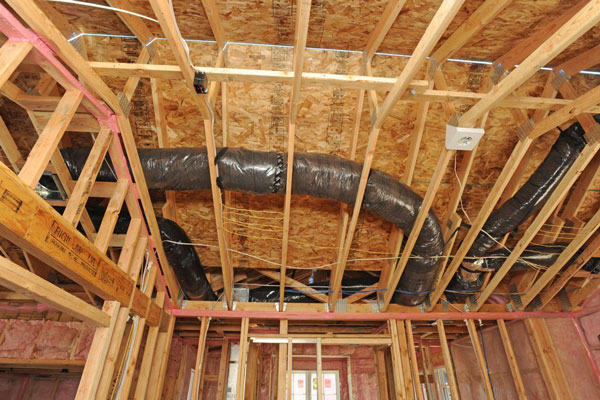
Air ducts leak. Ducts that run through unconditioned spaces should be sealed and insulated. Many people feel that all duct systems should be sealed. This ensures that the conditioned air gets where it is needed, and that the return air comes from where it is supposed to come from.
Analyze the whole duct system to be sure that supplies and returns are adequate. Rooms that are uncomfortable may need additional duct runs (or may need to have the original ducts repaired). Sometimes the entire duct system must be overhauled along with the furnace replacement.
Heat pumps are now available up to 20 SEER. These heat pumps use a fraction of the energy used by the old models. Many manufacturers have a minimum size for their heat pumps. It is generally difficult to find units in the 1-ton (12,000 Btu per hour) or 1 1/2-ton range. Many manufactures offer nothing smaller than 2-ton units. This is changing, as the market demands smaller high-efficiency systems for high-efficiency houses.
The most important thing with air conditioning is to size the system properly. Outside and inside design temperatures must be appropriate for your area, and the system should be the minimum size possible for the house. Too large is bad, very bad. The system will short-cycle, using more energy. It will not dehumidify properly, leaving the house clammy. The problem is that human nature has people afraid that they made a mistake and the house might not be cool enough on a very hot day, so they fudge the size up.
The final option for heating and cooling would be some type of ground source heat pump. These units have a high initial cost—sometimes triple the cost of a conventional system.
Lighting and Appliances
The Energy Star labeling initiative has had an incredible impact on how appliances consume energy. At the same time, consumers can purchase more electrical gadgets now than ever before. They have become more efficient, but we own more of them.
Minimum efficiency standards for major appliances have improved the overall efficiency of these appliances dramatically. At the same time, even higher efficiencies than the new minimums are available. Refrigerators, freezers, dishwashers, and washing machines are where the greatest improvements have been made. Many times, refrigerators and freezers offer a fast, simple payback. Clothes washers and dishwashers offer water and electrical savings, making them a solid investment as well. How quickly they pay for themselves depends on your local utility rates.
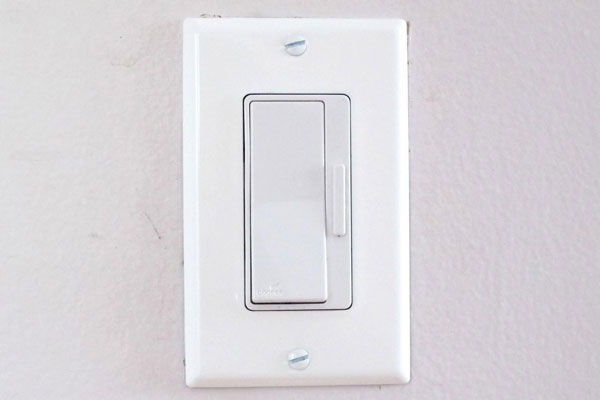
Lighting can account for a significant part of a home’s electrical consumption. Converting bulbs to LEDs or installing dedicated high-efficiency fixtures offers long-term savings. The goal with lighting retrofits is to provide ample light while reducing energy use. Light meters can help you to determine if a room has adequate light. Often you may find an area that is overlamped.
Up to 75% of the power consumed by home electronics is used while the devices are turned off. This is called ghost or phantom usage. The instant-on devices are steady consumers of power. Installing interruptible power strips and using them is an excellent way to reduce this consumption. Computers, routers, wireless networks, cable boxes, televisions, DVD/VCRs, microwaves, and stereos are all examples of devices that consume lots of power even when they are turned off. Timers can even be used to automate the interruptible power strips.
The nicest thing about lighting and appliance savings is that they are there with you month by month. Unlike heating or cooling savings, which are seasonal, these savings are ongoing and consistent, 24 hours a day, seven days a week, 365 days a year.
Solar and Wind Options
When you retrofit a home, don’t overlook the renewable energy options. Improvements in these technologies, and falling prices, along with strong incentives in certain regions, make renewable energy a viable choice. It will not be addressed in detail here. The thing to remember is to get your house in order before you think about installing renewable power.
Purchase the most efficient appliances, convert your lighting, and manage all your other loads, before you install renewable power; doing this will cost less per kWh saved than the cost per kWh produced by installing wind or solar. It will also reduce the amount of renewable power needed for your applications, which in turn will reduce the cost of installation.
Similarly, you should air seal and insulate your home and even possibly upgrade your windows and doors before you install a ground source heat pump or some type of solar heat. The retrofits you install will dramatically reduce the size requirements of the alternative heating or cooling systems. Buying the retrofit will cost fewer dollars than buying a big system.
For most people, greening a home should be viewed as a long-term process. Investments can be made incrementally over time, working toward the ultimate goal of becoming however green or efficient you want to be. And technological improvements will continue to make new things possible. People who operate retrofit companies need to view greening a home as a continuous process for their customers as well. Customer retention, referral systems, and backend sales should be the mantra of these contractors. This will best serve their clients and the environment, while also serving to build a strong and vibrant company.
Earn CEUs
Earning CEUs on the BPA Journal is a member-exclusive benefit. Please log in to complete the quiz and earn them or join as a member today.