Apr 19, 2022
Dust-control Strategies for Energy Upgrades
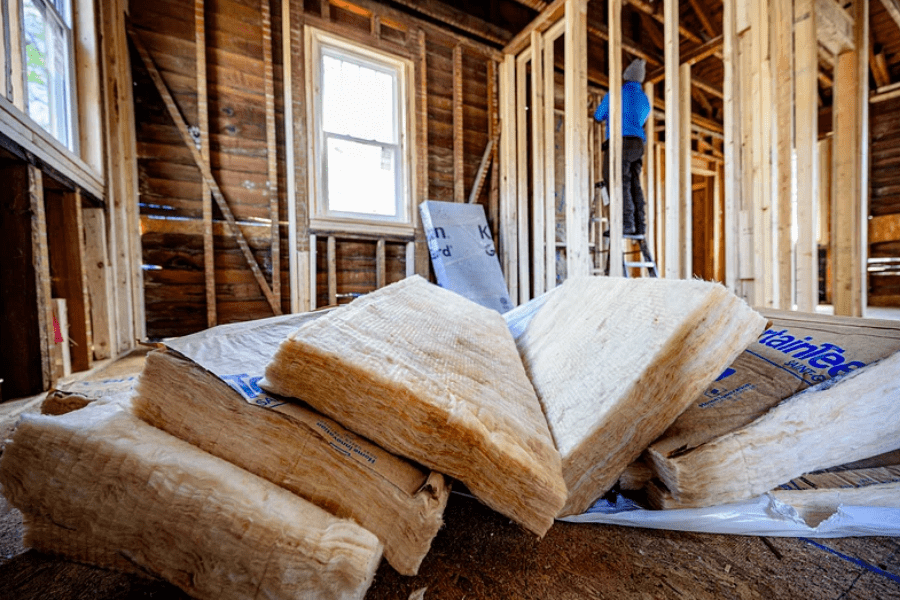
Completing weatherization and home performance upgrades can be dirty work. Add the challenges of being in occupied homes, and you have one of the toughest jobs in the industry! The type of dust created during energy upgrades ranges from a substantial nuisance to a documented hazard, like lead or even asbestos.
By: Cory Chovanec
Completing weatherization and home performance upgrades can be dirty work. Add the challenges of being in occupied homes, and you have one of the toughest jobs in the industry! The type of dust created during energy upgrades ranges from a substantial nuisance to a documented hazard, like lead or even asbestos. Program and regulatory compliance (OSHA, EPA, and so on) is often thought of as the primary reason to work safely and control dust, but customer and worker safety are equally important. The good news is that with a little planning and the right tools, you can overcome the many dust-control challenges facing today’s installer and clearly set yourself apart from the competition.
The Benefits of Dust Control
Effective dust control can increase jobsite efficiency by reducing cleanup time and can protect workers and occupants while improving the quality of your work and your organization’s level of customer service.
Reducing dust and protecting a home’s flooring can make a lasting positive impression on your customers. Imagine two contractors preparing to install sidewall insulation from the interior by drilling holes on the inside of a home. One drills the holes with little to no floor covering, allowing a fine layer of dust to cling to every object in the room. The other carefully constructs a barrier wall from floor to ceiling, protects the floor with plastic sheeting, and uses a shroud attached to a HEPA vacuum while drilling the holes, limiting the amount of dust in the room.
Which one would you choose? Which one would you refer to a neighbor or consider a “professional”? As a quality assurance inspector, I have interviewed customers on the receiving end of both scenarios and, as you may have guessed, the ones whose contractors practiced dust control were far more satisfied with the job.
Working safe to reduce dust hazards is not only the right thing to do, it’s sometimes the law. Homes built before 1978, which contain lead paint, and older homes with asbestos mixed into the wall plaster or drywall compound pose safety hazards for which there are additional requirements.
The work practices described in this article are general practices; they do not provide a step-by-step protocol for meeting each state or program’s lead and asbestos rules. Check with your state health department and program funder to ensure that your work practices are following OSHA, EPA, and the Standard Work Specifications (SWS) required by the Weatherization Assistance Program (WAP) before you embark on a renovation project.
Customers need to know that their family will be safe when a contractor weatherizes their home. Read on to learn from those who have spent decades in the field developing creative and cost-effective methods for weatherizing homes while complying with related safety rules.
Achieving Effective Dust Control
Let’s look at the key elements supporting effective dust control.
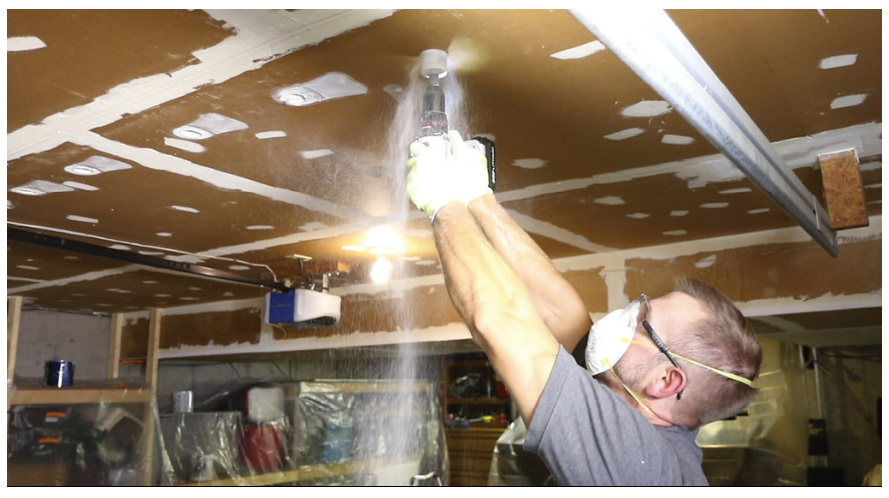
Shrouded Equipment
Less dust means fewer hours spent cleaning up at the end of each project. When cutting or drilling with a power tool, use a shroud attached to a HEPA vacuum. Many tool manufacturers have shrouds that fit their tools; prices range from $50 to $300. A lower-cost alternative is a homemade shroud, which can be made for under $20 and often works as well or better.
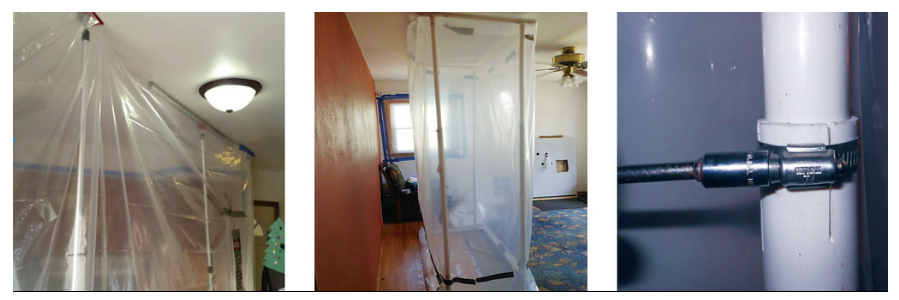
Constructing Containment
Containment is a broad term. It can mean anything from a piece of plastic on the ground to a barrier wall or a small enclosure. Homemade PVC frames or commercially available extendable poles can be used to create barrier walls or enclosures to limit the spread of dust. Containments work well for a variety of residential measure installations, such as:
- cutting attic access holes;
- drilling wall insulation access holes;
- installing mechanical ventilation; and
- making electrical upgrades.
The goal of any containment is to collect dust or debris and prevent it from spreading to other areas of the home. In some cases, regulations may require containment. In other cases, you may choose to use a containment strategy to restrict occupant access or prevent insulation or demolition debris from creating a nuisance for the homeowner. This can be especially beneficial when working on homes where the occupants have respiratory issues. The keys to effectively setting up a containment work area are to plan ahead and to have the right material for the job. Follow these steps when setting up an interior containment:
- Minimize the work area to conserve material and reduce cleanup time.
- Remove any objects from the work area.
- Cover immovable objects or electronics with disposable plastic sheeting.
- Protect the floor.
- Install plastic barrier walls or mask the area with plastic.
- Install an “I” door or use a zipper door for access.
These steps are general good practice and may vary depending on the type of work or the hazard you are dealing with. The WAP SWS require dust control to protect worker and occupant health. Following the work practices and containment strategies described above helps to ensure that this requirement is met. For example, SWS 4.11.1.1a, under Insulation/Walls/Preparation/Exterior Wall Dense Packing/Single-Family Homes, says, “Interior will be masked and dust controlled during drilling when accessing from interior.”
Exterior work requiring containment, such as installing windows or removing painted siding, uses some of the same tools, and is based on some of the same concepts as interior work, but in exterior work the priority is protecting the ground and any adjacent properties. For lead renovator and asbestos work, you must also post warning signs, and follow more-specific work protocols. Follow these steps when working on exterior containments to keep dust and debris from insulation upgrades or renovation to a minimum and to streamline the cleanup process:
- Remove any objects from the work area.
- Minimize the work area (unless the space is specified by regulation, e.g., 10 feet of ground cover).
- Protect the ground.
- Close or cover exterior windows within the work area.
- Install a hygiene area and tack pad outside of the work area. (A tack pad is a small piece of plastic that workers stand on to remove personal protective equipment.)
- Wrap 2 x 4 lumber in the plastic ground cover to form a curb around the work area to prevent debris from spreading and to weigh down the plastic.
Working Wet
Work wet whenever possible. This helps to reduce dust. Misting surfaces with amended water prior to or during cutting and drilling helps keep dust particles from becoming airborne. Fill a small paper cup with shaving cream when drilling small holes and use it as a shroud; the dust and debris will cling to the shaving cream. This technique works well for pilot drill holes when using drywall anchors to install smoke alarms or CO detectors, or for smaller test holes an energy auditor may drill when checking for existing insulation. An alternative method is to add a bead of shaving cream to a Post-it Note below the hole being drilled before drilling small holes. The dust clings to the shaving cream on the paper rather than falling to the floor.
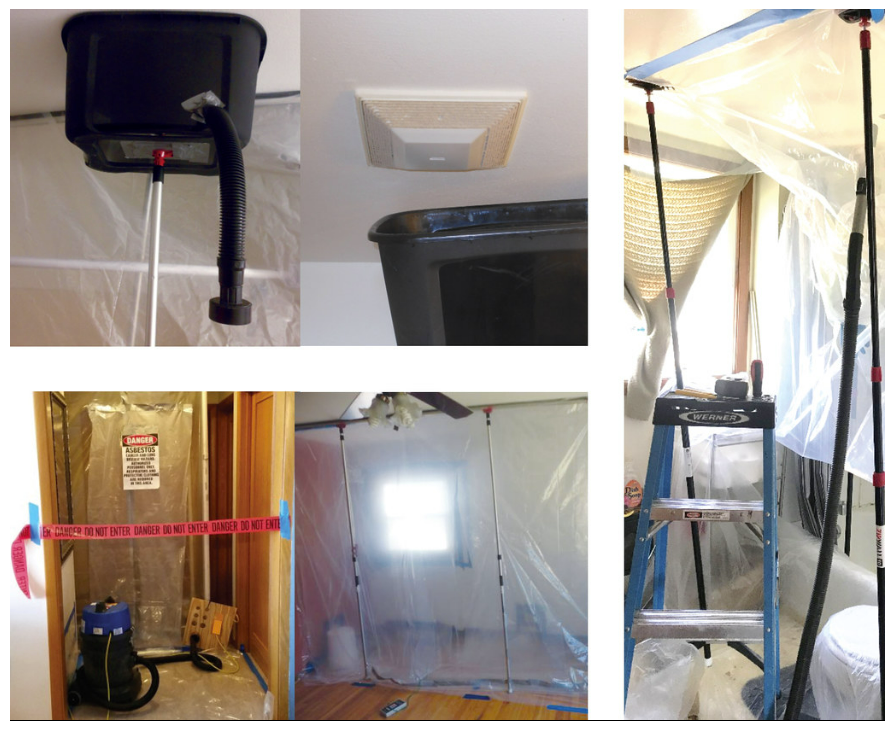
Innovations
Field staff have come up with many creative ideas over the years. Here are a few of them:
- Use a 6-gallon storage tote as a shroud for exhaust fan upgrades when work can be done from the attic space. A HEPA vacuum can be incorporated if desired.
- Use an asbestos glove bag while drilling interior insulation access holes or installing a new exhaust fan. This is a great way to keep difficult work clean in confined areas, such as a customer’s bathroom.
- Use a HEPA vacuum with the end of the hose placed into the containment enclosure to create a slight negative air pressure in the work area. When the hose is placed in the side of the work area farthest from the worker, dust is drawn away from the breathing zone.
Worker Protection
Over 20 years ago, when I first started working on existing homes as a young weatherization installer, there were no formal training programs or mentors to teach me dust-control strategies, and methods like using tool shrouds were not consistently implemented. We live in a different world now, where crews and contractors have access to high-quality personal protective equipment (PPE), effective tools to get the job done right, and workplace respirator programs for staff.
When working with lead, asbestos, or even just itchy fiberglass insulation, the following PPE is recommended:
- protective coveralls;
- head covering (hat, painter’s spray sock) or coverall with hood;
- full face respirator with HEPA filter;
- high-quality gloves; and
- shoe covers.
Your employer is not the only one responsible for worker safety; it is up to each one of us. If you see someone on your jobsite ignoring safety rules or using inadequate PPE, I encourage you to say something. Our mission of improving energy efficiency, comfort, and health is an important one. We need to make sure that the people who do the work and the people who live in the homes we work on are protected.
Spreading the Safe Work Practice Knowledge
While there is no substitute for formal training on safe work practices or for field experience, we can learn from each other by sharing ideas and by using some of the techniques described in this article. If you are already using these techniques and have confidence in yourself, continue doing what you’re already doing. In addition, I encourage you to share your expertise and experience with the next generation of retrofit installers. If you are new to the industry and are just learning about safe work practices, I hope you use the techniques described in this article and seek out training specific to any hazards you may encounter.
Earn CEUs
Earning CEUs on the BPA Journal is a member-exclusive benefit. Please log in to complete the quiz and earn them or join as a member today.